🔄 TL;DR Link to heading
- Installed Kali Linux on an old gaming PC with a graphical installation and XFCE desktop environment
- Transformed it into a headless setup for more flexibility and remote-friendly interaction
- Used TigerVNC and noVNC to bridge the gap between headless hardware and the need for a graphical interface
- Result: Kali Linux runs unencumbered by physical peripherals, and its graphical interface streams flawlessly to a web browser, offering both the power of Kali Linux and the flexibility of remote access.
The Journey to a Headless Kali Linux Link to heading
Discovering an old gaming PC tucked away in the cellar felt like unearthing a hidden treasure. With a penchant for Debian-based distributions and a keen interest in cybersecurity, I decided to breathe new life into this forgotten relic by installing Kali Linux. Opting for a graphical installation, I chose the lightweight, efficient Xfce Desktop Environment, perfect for my needs.
However, my enthusiasm for a sleek, minimal setup led me to an unconventional decision: I disconnected the monitor, keyboard, and mouse, embracing a headless setup. This transformation wasn’t just about reclaiming physical space; it was about setting the stage for a more flexible, remote-friendly interaction with Kali Linux.
To bridge the gap between the headless hardware and my need for a graphical interface, I turned to TigerVNC, noVNC and websockify, powerful tools that seamlessly bridge my Kali Linux box to my web browser. This setup allows me to run Kali Linux without physical peripherals, controlling it entirely through my browser.
The Setup Process Link to heading
Step 1: Choosing XFCE Link to heading
The first step was installing the XFCE desktop environment during the Kali Linux setup. XFCE is known for its simplicity and low resource usage, making it an ideal choice for a system being repurposed as a headless server.
If you’re not utilising graphical installation, you can install XFCE using the following command:
sudo apt update
sudo apt install kali-linux-default kali-desktop-xfce
Step 2: Disabling LightDM and Clearing Locked Files in /tmp Link to heading
To ensure that unnecessary services don’t consume system resources or conflict with our headless setup, start by disabling and stopping LightDM
sudo systemctl disable lightdm.service
sudo systemctl stop lightdm.service
Next, address potential issues with locked files in the /tmp directory. Locked or stale files in /tmp can sometimes cause problems, especially after changing how the system handles graphical sessions. Safely remove these locked files to avoid any session conflicts:
sudo rm /tmp/.X*-lock
sudo rm /tmp/.X11-unix/X*
It’s crucial to ensure that these actions don’t inadvertently affect any currently running processes. The commands target specific lock files related to X sessions, which should be safe to remove if you’re transitioning to a purely VNC-based setup.
Step 3: Introducing TigerVNC and noVNC Link to heading
Set up TigerVNC to provide remote access to the XFCE desktop environment and implement noVNC to access the VNC session via a web browser, facilitating a seamless interface to interact with Kali Linux remotely. This step involves installing TigerVNC and noVNC with the following command:
sudo apt install tigervnc-standalone-server novnc
Setup the environment Link to heading
Once finished with the installation, we need to set up the VNC password. No need to set a view-only password.
┌──(infosec㉿ShadowFox)-[~]
└─$ vncpasswd
Password:
Verify:
Would you like to enter a view-only password (y/n)? n
A view-only password is not used
We also need to create a file needed for VNC. It does not need to have anything in it.
┌──(infosec㉿ShadowFox)-[~]
└─$ touch ~/.Xresources
Start / Stop the Services Link to heading
I’ve created a few bash scripts to start and stop the services.
Why Not x11vnc? Link to heading
An important decision in this journey was opting not to use x11vnc. The key reason is that x11vnc shares an existing X session rather than creating a new virtual desktop environment. In a headless setup, where there’s no physical display connected, a virtual desktop is crucial.
TigerVNC provides:
- This capability.
- Creating a virtual desktop session that can be accessed remotely.
- Making it the superior choice for this particular setup.
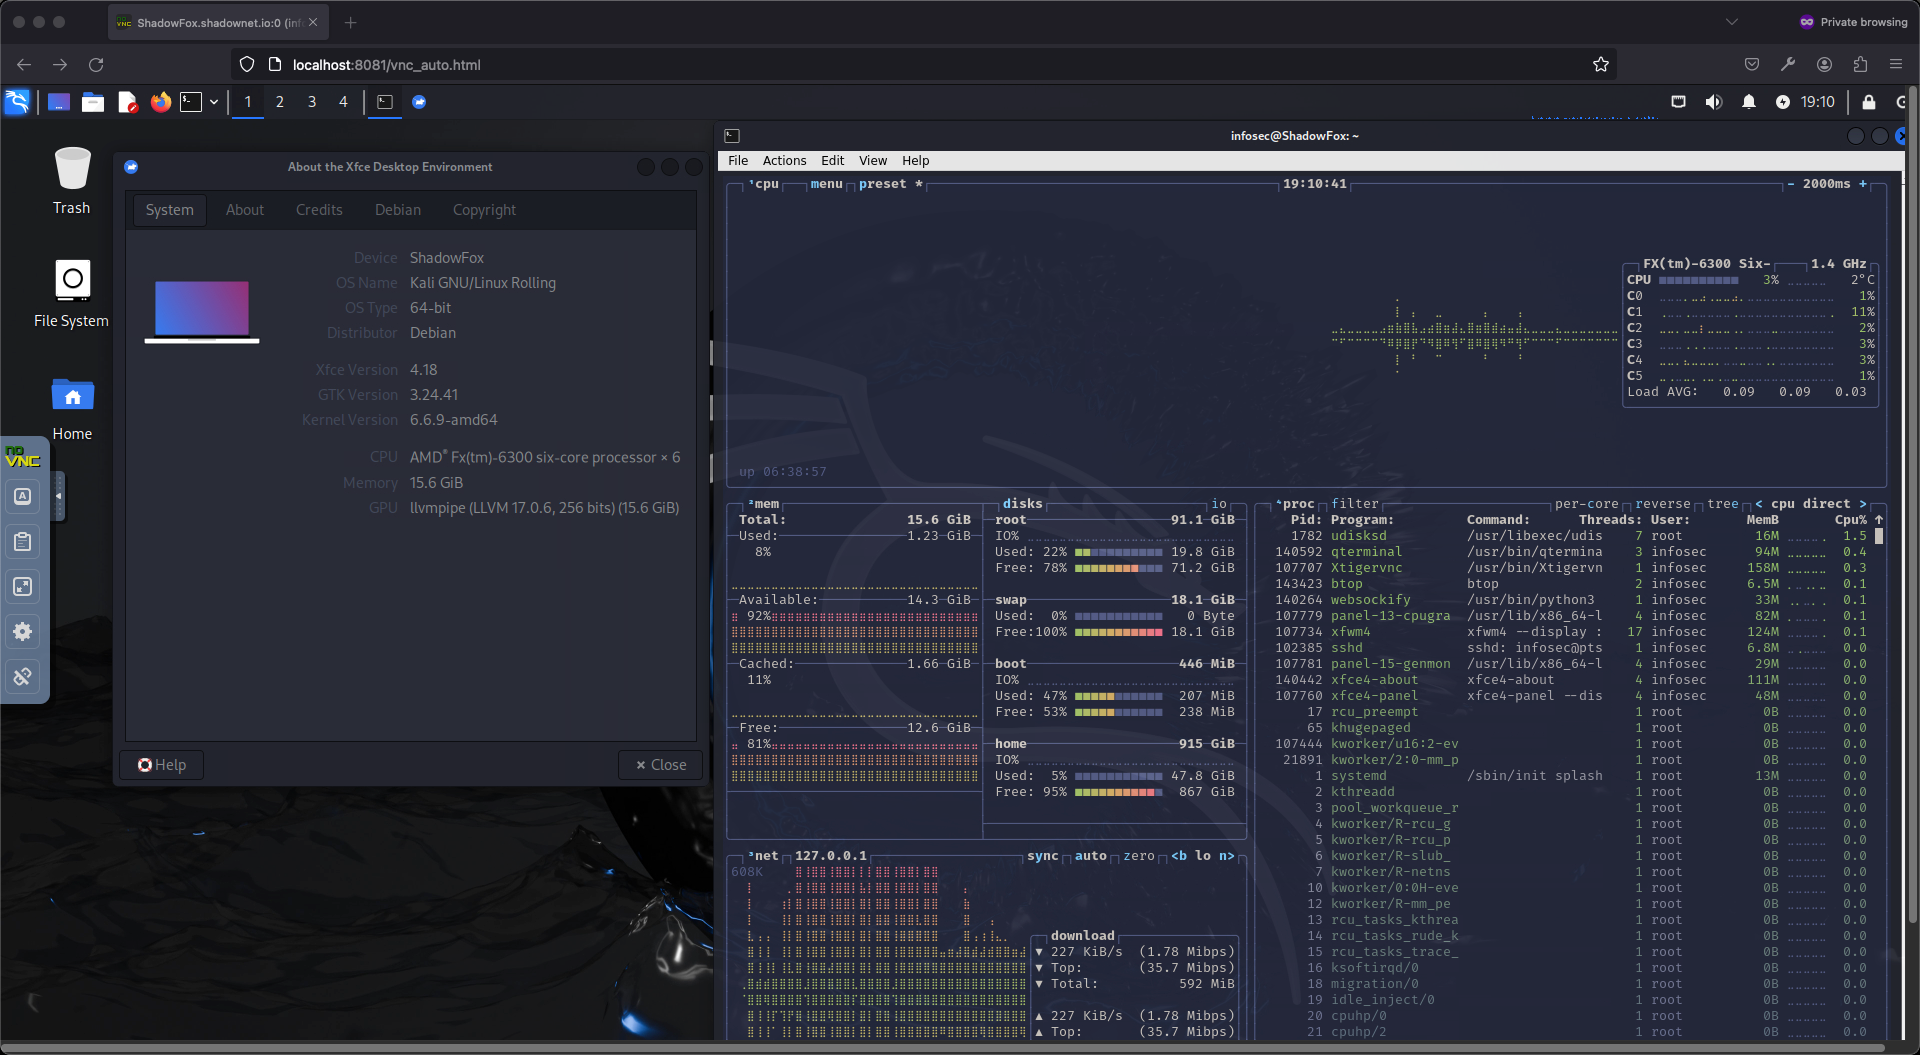
The End Result Link to heading
Now, my Kali Linux system runs unencumbered by physical peripherals, and its graphical interface streamed flawlessly to my browser (or even to VNC client). This setup capitalizes on the capabilities of an old gaming PC. It aligns perfectly with my cybersecurity projects, offering both the power of Kali Linux and the flexibility of remote access.